Introduction
The intelligent eco-house or house (for short) described in this document has been designed under EcoThings Project KA220-SCH-7704FBD4 (Erasmus+). The purpose of this house is to serve as a mock-up in order to evaluate the set of proposed electronics in the context of an intelligent ecological house using similar principles of real passive houses and energy saving systems. As a consequence, the design has been oriented in providing low-cost solutions, considering as well as manufacturing aspects including 3D printing and laser cutting.
Before reaching the proposed solution, we have explore several ideas in a brainstorming preliminary phase. Ideas were not too much elaborated, and indeed some of them are technically difficult and complex, but during this phase, we were seeking trying to bring new ideas upfront and indeed, some of these ideas were indirectly included in the final version of the proposed prototype, others were simply discarded or left for a future version, due to its complexity.
Preliminary ideas
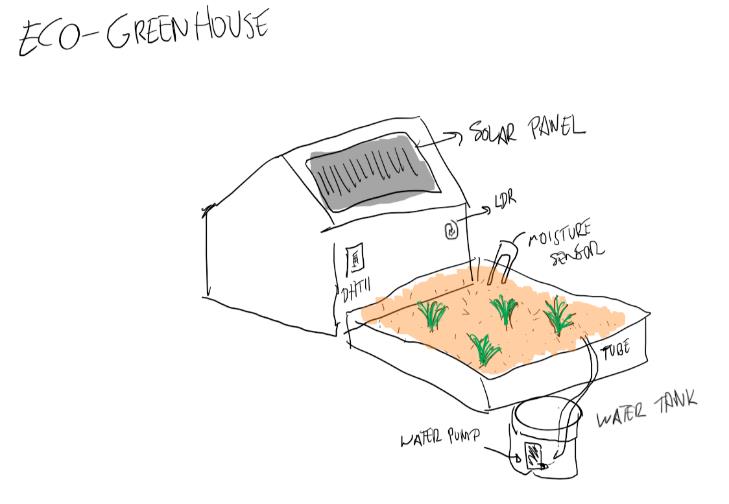
During our first online meeting, we show to our partners a set of preliminary ideas. From the very beginning, we were discussing on the idea of developing a smart-house taking ecological aspects during the design phase into account. Apart from the smart-house, we also considered additional “eco-things” that we could implement during the project, so the preliminary idea was to not only design the house, but also a set of additional “eco-things” that were closely related with the smart-house. Here we show some of the draft ideas presented.Eco-greenhouse: Using a temperature sensor (DHT11 or any similar one), a light sensor (LDR) and a moisture sensor (soil humidity) we could grow plants for a smart eco-greenhouse. A water pump would drain water into the greenhouse when needed. In the end, most of these ideas were not implemented because the use of water with wood-made and/or cardboard parts to build the house walls could be messy, but the fact of using a temperature sensor together with a light sensor, was useful to integrate them into the smart house.
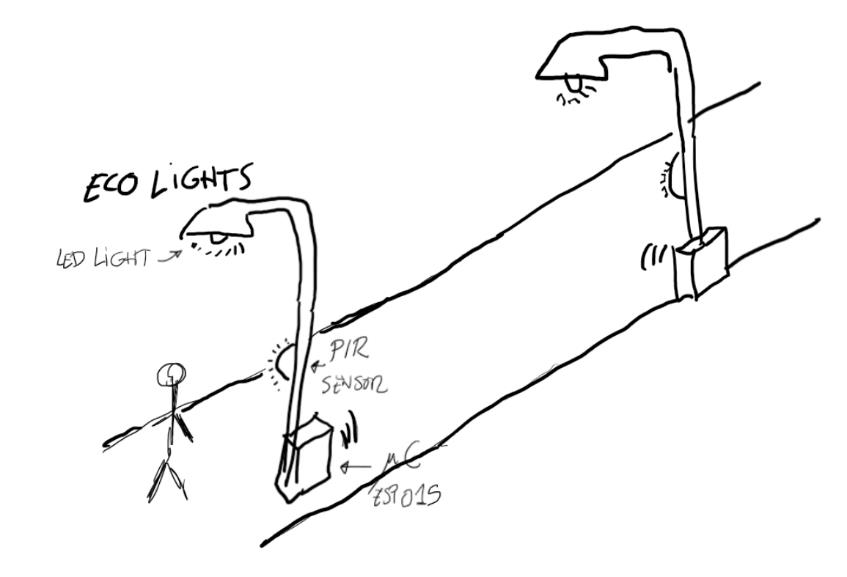
Eco-lights: The idea behind of eco-lights was to save energy by detecting the presence or absence of people walking on the street. Using a PIR sensor, we could detect the presence of people on the street and decide to switch on the lights meanwhile its been detected (and likely during a short amount of time just before and after). Lights could be connected over
internet, so detection could actually affect to several lights in order to cover a wider area. Part of these ideas were finally included in the smart-house as part of the bedroom proposed solution as it will be described later on.
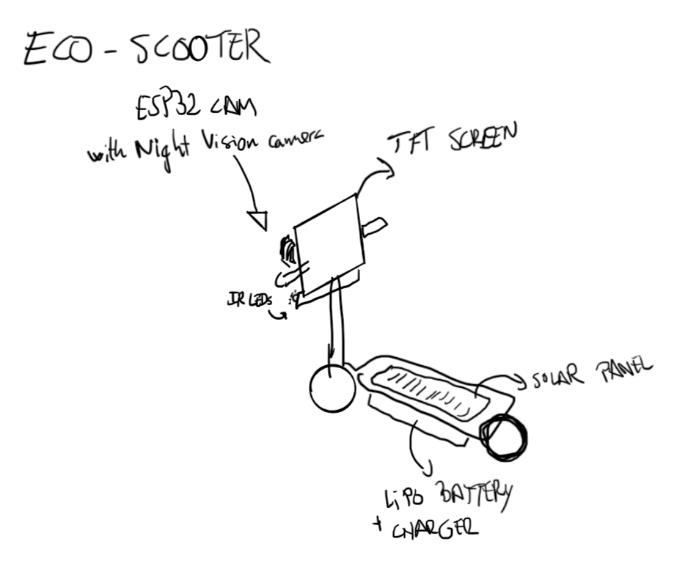
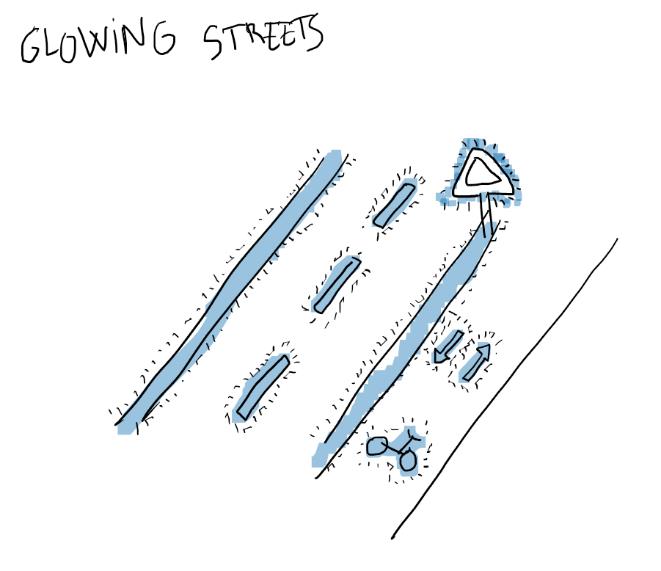
Eco-scooter and glowing streets: To contribute to mobility solutions aimed to low environment impact, we thought that might be a good idea to implement an electrical scooter (low-scale prototype) that included a ESP32 CAM with a night vision camera and a TFT Screen. The idea was to show on the TFT screen the camera image. Our “vision” was that, not just the house, but the city had to go into “dark mode” to reduce light pollution. So the idea is that scooter could use infrared LEDs and a night vision camera to display images on the TFT screen with high sensitivity. In addition to this, we considered the idea of using glowing painting so emphasized the traffic signs and horizontal signs. In the end, we decided to use the ESP32 cam for a future version that can be integrated in the smart house. The main reason is that despite of the fact that ESP32 cam was operative, we found a lot of issues that caused technical difficulties and we considered that it was too complex to be implemented at schools (particularly primary schools). Besides that, our prototype includes the possibility to include a ESP32 as a smart home safety system (i.e.: motion detector). We also decided to include the TFT screen as part of the smart house to be able to display variables of interest.
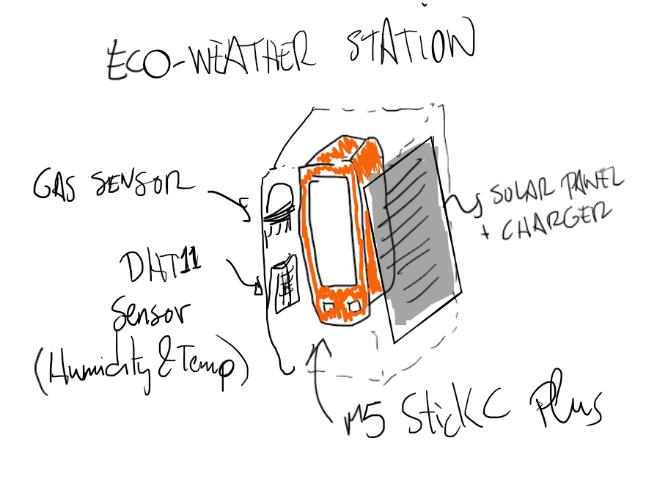
Eco-weather station: The idea behind the eco-weather station was to monitor temperature and air-pollution and display the information on a M5 stickC Plus device that included a small embedded screen. Using a Gas sensor (MQx), we can measure air pollution, while the DHT11 sensor could be used to measure temperature and humidity. In the end, these ideas were transformed and integrated as part of the smart house. The difference is that instead of measuring temperature, we decided to measure noise (with a MIC), because external temperature could be obtained via web services. Also, instead of measuring air pollution, we decided to detect smoke in the house to prevent from fire.
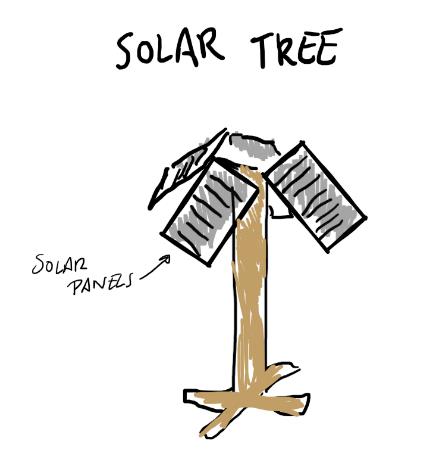
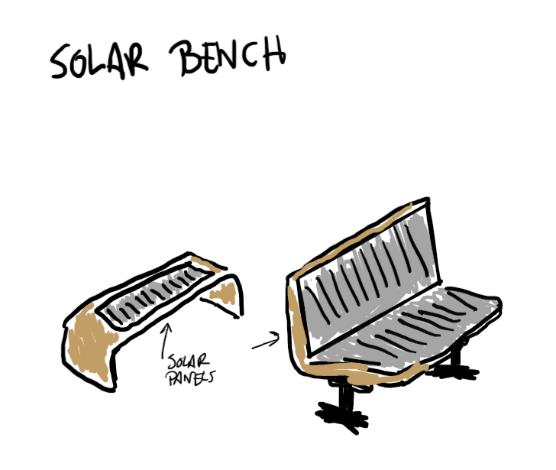
Solar tree and solar benches: These two ideas we indeed quite promising, and as you could see from all of our previous ideas, all of them include solar panels. So the idea was that every “eco-thing” was environmentally friendly sustained with its own energy source, but apart from that, we thought that it might be a good idea to include additional sources of energy integrated in the urban design of parks and green areas. The problem is that after some tests, the solar panels used for low-cost solutions did not seem to provide enough energy to even charge a LiPo battery, so in the end, these ideas were discarded.
House Description and Design
The presented design is the latest version, but during the design period of PR1 we have published several designs. We consider that even the current design is still a preliminary version, that can change over time when we collect actual feedback from schools.
House Layout
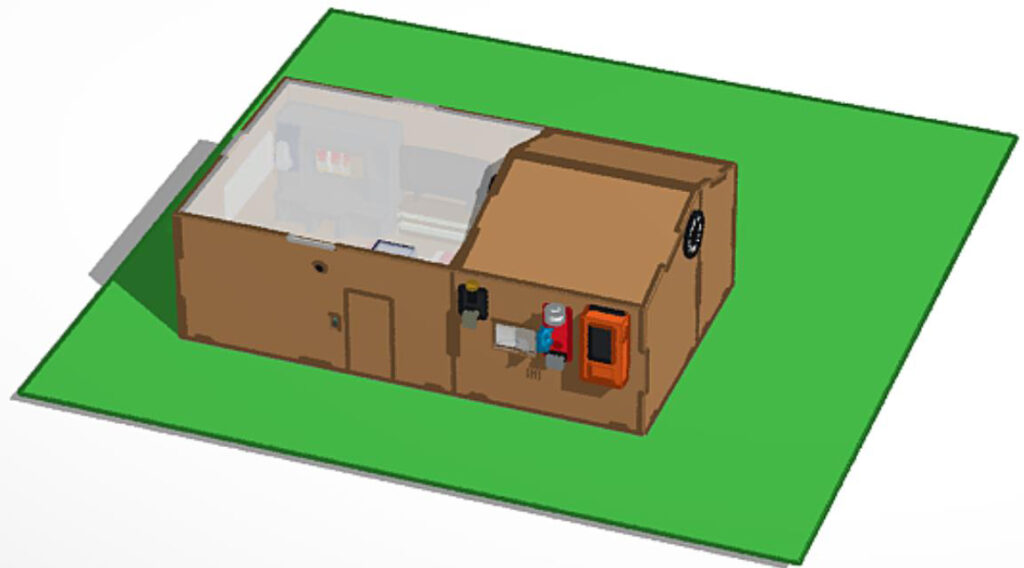
The smart house includes a living room, a bedroom and a kitchen. Outside the house we can place the electronics (on the rear part).
All three rooms have been designed to be modular, which means that they can be separated and only one of them can be implemented if so wished.
The house can be manufactured using laser cutting or 3D printing technologies. These two technologies are accessible to many schools (either because they have their own means or because out-sourcing a manufacturing service is affordable).
All designs have made public. In particular, we laser cutting parts and 3D models made with solidworks can be found on a github repository:
https://github.com/roboticafacil/ecothings
And TinkerCAD account:
https://www.tinkercad.com/users/2TqR7TZEqHV
It is important to remark that there might be some differences between the laser cutting parts and the 3D printed parts due to the fact that the rooms can be
Sensors and actuators have been placed in and around the house so that they are integrated in furniture, kitchen-ware or room-ware, to actually have the appearance of a house.
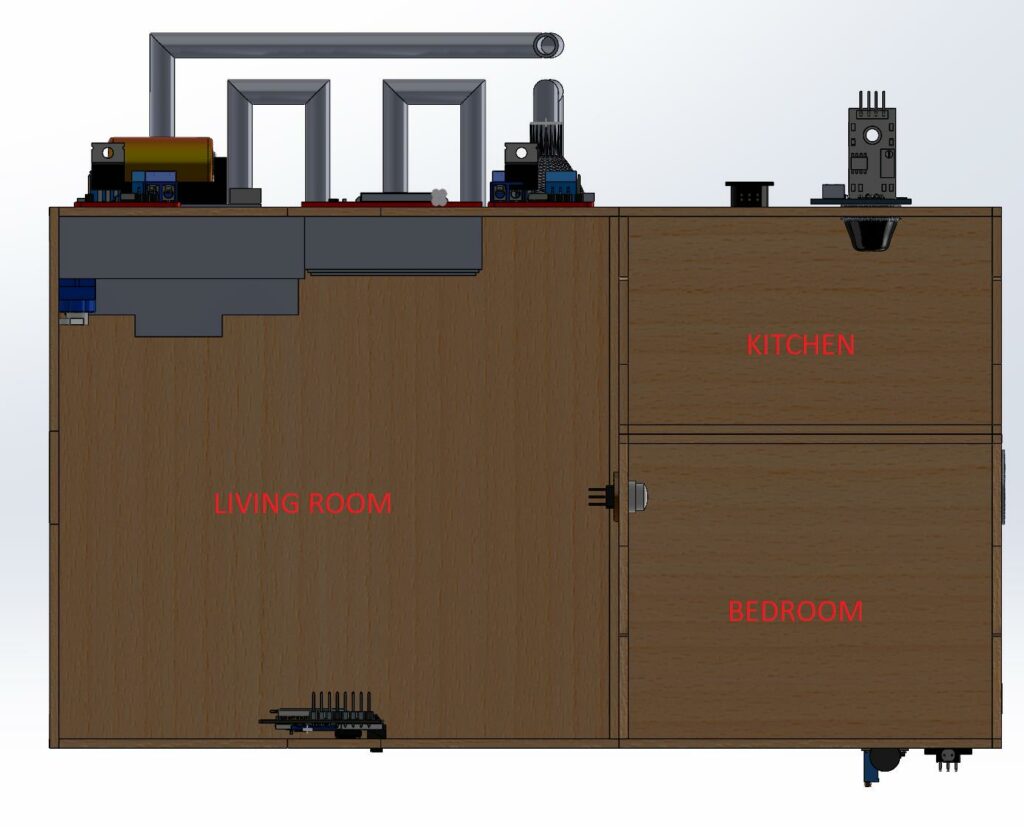
Living room
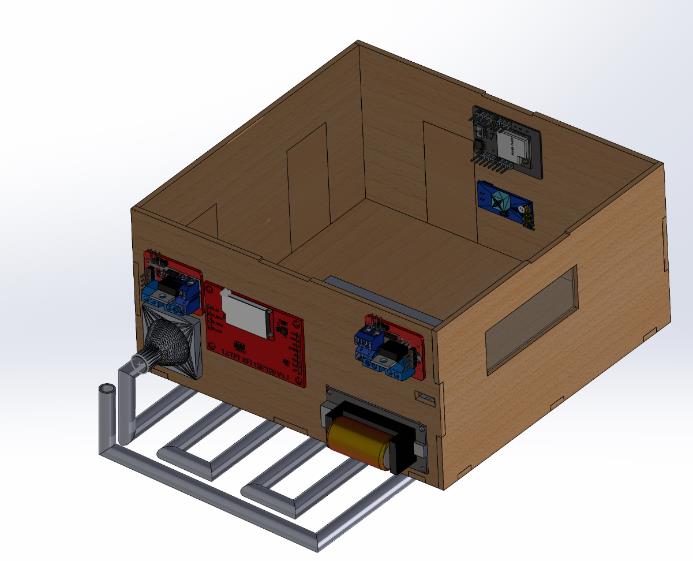
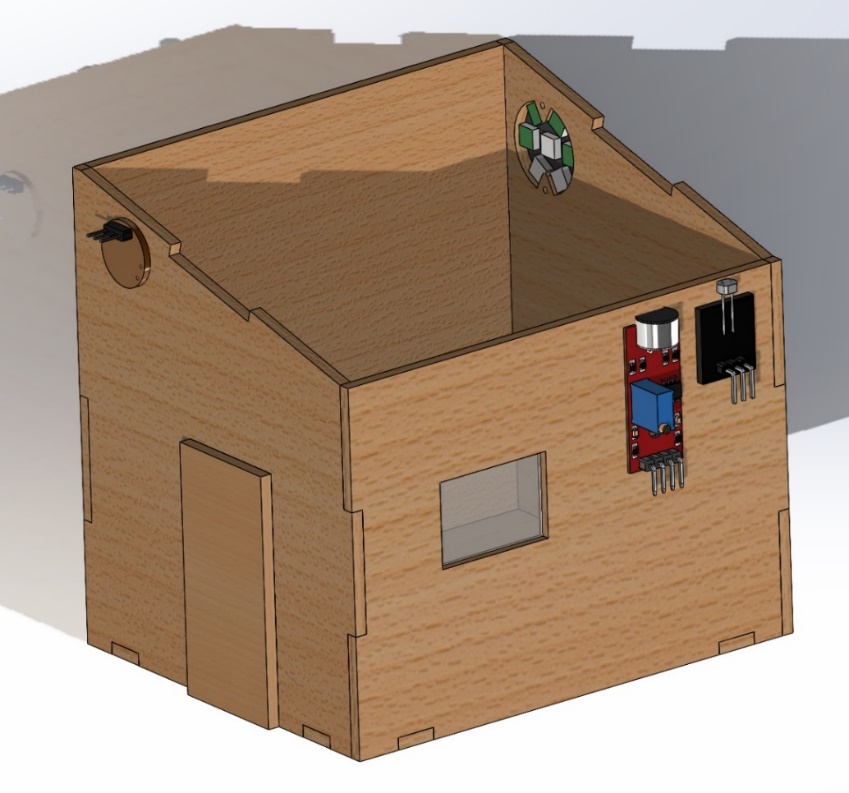
Living room is used to teach pupils the importance of energy saving and it is inspired in passive houses. Depending on the temperature and humidity and outside temperature, we can decide to either produce heat using a pack of resistors (inside the chimney) or to produce air ventilation using a fan (double direction control to push-in or push-out air into the room). Air ventilation can be used to warm or cool down the room due to the fact that air will be conducted underground (mimicking real passive houses solutions), since underground temperature is more stable than outside temperature. In the prototype, we obviously do not expect to work exactly as a passive house, but similar principles are implemented in the end.
The living room has a temperature sensor (NTC sensor) to measure room temperature. This is an analog sensor can be connected to any of the analog input pin. In addition to this sensor, the living room uses a set of resistors to heat the room. Resistors are, indeed a set of 12 standard 0.5W resistors in a parallel configuration, so each of them dissipates a small amount of energy, but all together, they work as an actual heater. These resistors require a high current demand so actual current will be driven by a MOSFET connected to any digital output pin. To cool down the temperature (or even warm-up the room if the external temperature is higher that the room temperature), we can use a fan, which is a brushed DC motor that can be driven with another MOSFET. Eventually, we might prefer to cool down temperature just by simply opening a window with a servo motor. Both the resistors and the servo are integrated into a chimney/library as part of the house decoration. The living room also includes a TFT Screen to display the smart house status and it has the appearance of a TV screen. This is a full-featured RGB screen that can be used for many purposes.
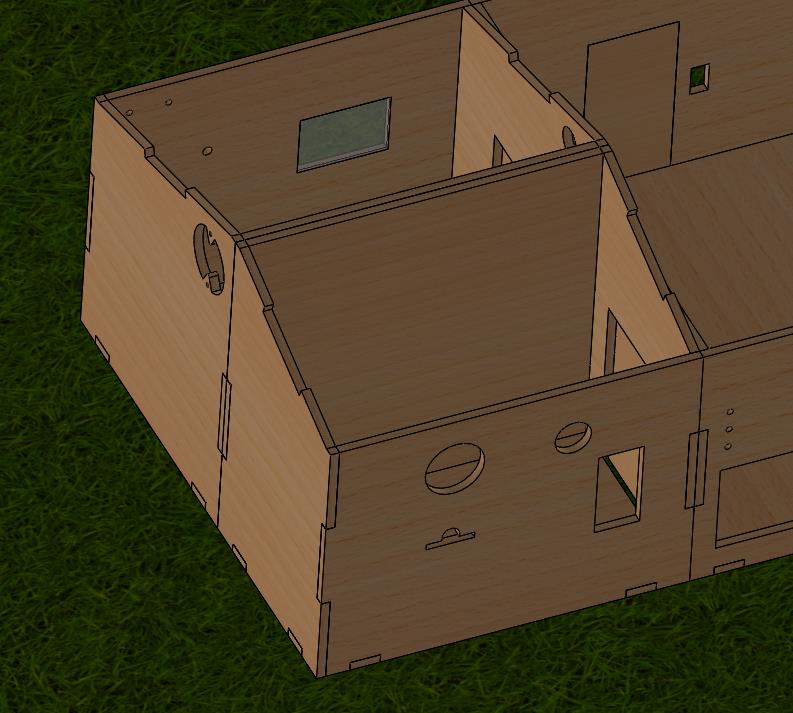
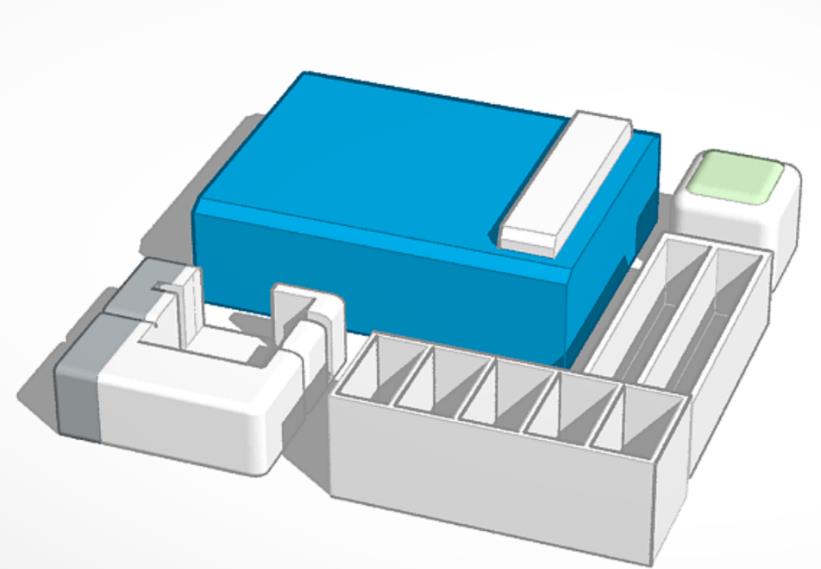
Here we show the designed living room using laser cutting parts, but also a printable version is also available in our TinkerCAD.
https://www.tinkercad.com/things/4YHhi7fpkSa
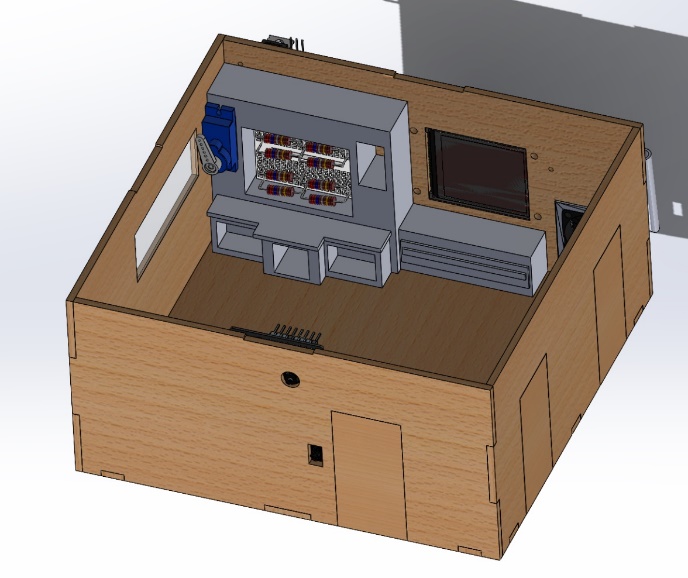
We have also designed some printable parts that can be included as part of the decoration of the house.

https://www.tinkercad.com/things/eiUMWgYQmqW
The fan requires a part to be integrated in the wall and to insert a plastic tube that goes underground mimicking passive house solutions.
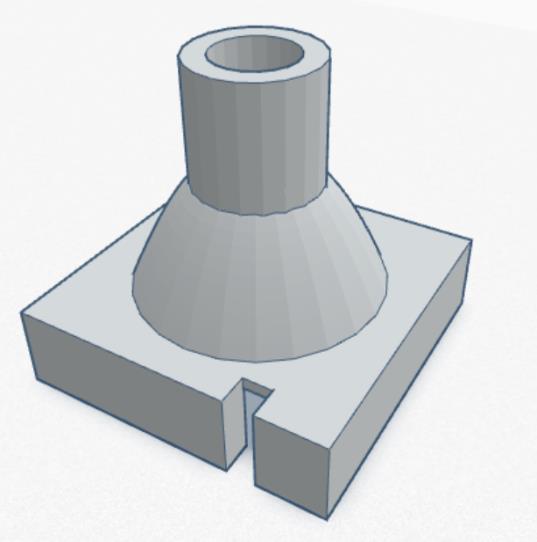
https://www.tinkercad.com/things/4yucwFWE633
Bedroom
Bedroom light control, based on current daylight and the presence of people in the room and external light (with a LDR), we can save energy and also reduce noise pollution using a sound (mic) sensor and a servo (to open/close the window). The bedroom includes a RGB LED strip so that the colour and brightness of the light of the bedroom can change accordingly to the user needs.
With all these sensors, we can decide to save energy by opening the window (with a servo) and switching on/off the lights of the RGB LEDs (the mic can be used to determine to close the window and switch on lights even if there’s light due to an increase of external noise). Also, depending on the weather, we can determine to open or close the window (i.e.: windy and rainy days it will stayed closed). Actual time and weather can be obtained via a WiFi API request to an external server such as OpenWeather, SNTP, or any similar service.
Bedroom ware (printable parts)
https://www.tinkercad.com/things/0Fj5DbUd3Ii
Kitchen
A kitchen with a gas and flame sensors that can detect smoke and fire. It also includes a buzzer for alarm beeping and a servo to open or close the window in case of fire or smoke. Using these two sensors we can warn with the buzzer and send an email to warn the owner and automatically close the windows.

Kitchenware (printable parts)
https://www.tinkercad.com/things/kh96pz71MsE
Other Pending ideas
- Intelligent main door opening based on a smart camera recording a video when a person rings the bell. The user can decide whether or not to open the door based on the stored image.
- A pollution station will be used to monitor the air quality as well as the noise pollution outside the house. This will be useful when deciding to open the windows of the house for natural ventilation of the main room and bedroom (independent of the temperature control).
- Solar, wind and kinetic energy saving: all saved energy will be monitored and displayed, proving an indication of the total amount of saved energy so far.
- Water-saving energy in the bathroom. The idea is to use a water filtering system based on a sand filter so that clean water can be stored to be used when bathing. Thus, when needed, when a button is pushed, a small water pump will allow bathing.
Building the Smart House
The folder “LaserCutting” of the GitHub project contains DXF files that can be used to laser cut the parts in plywood with 3mm thickness.
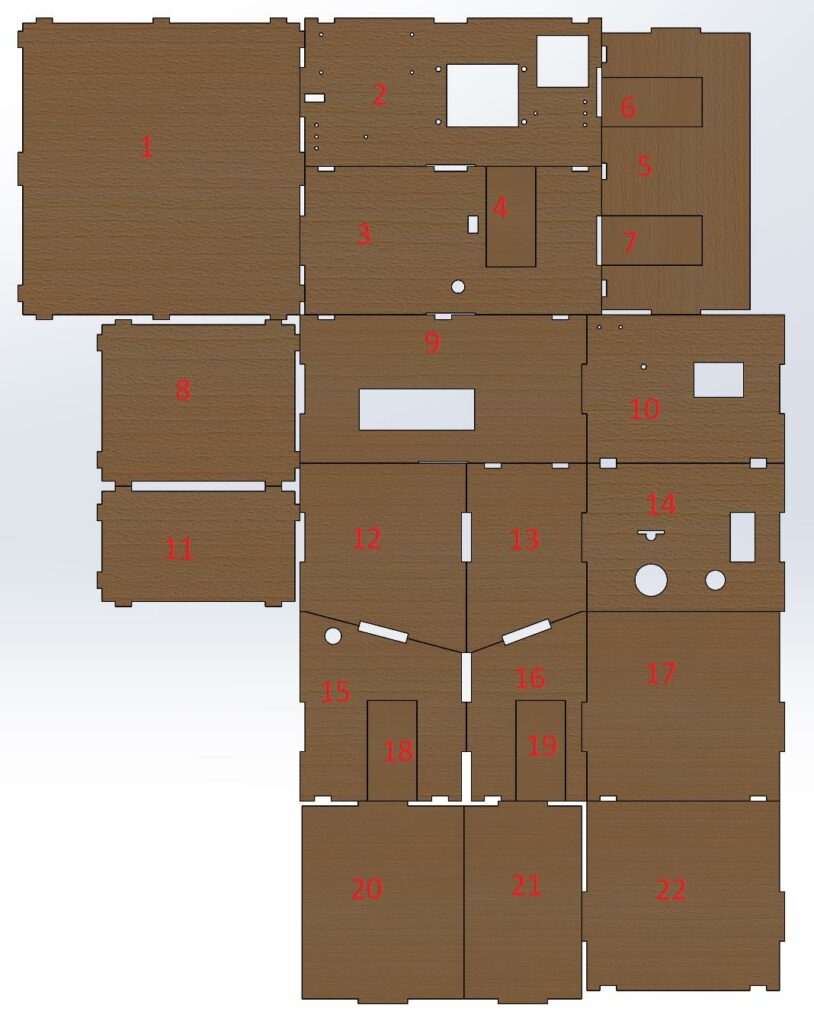
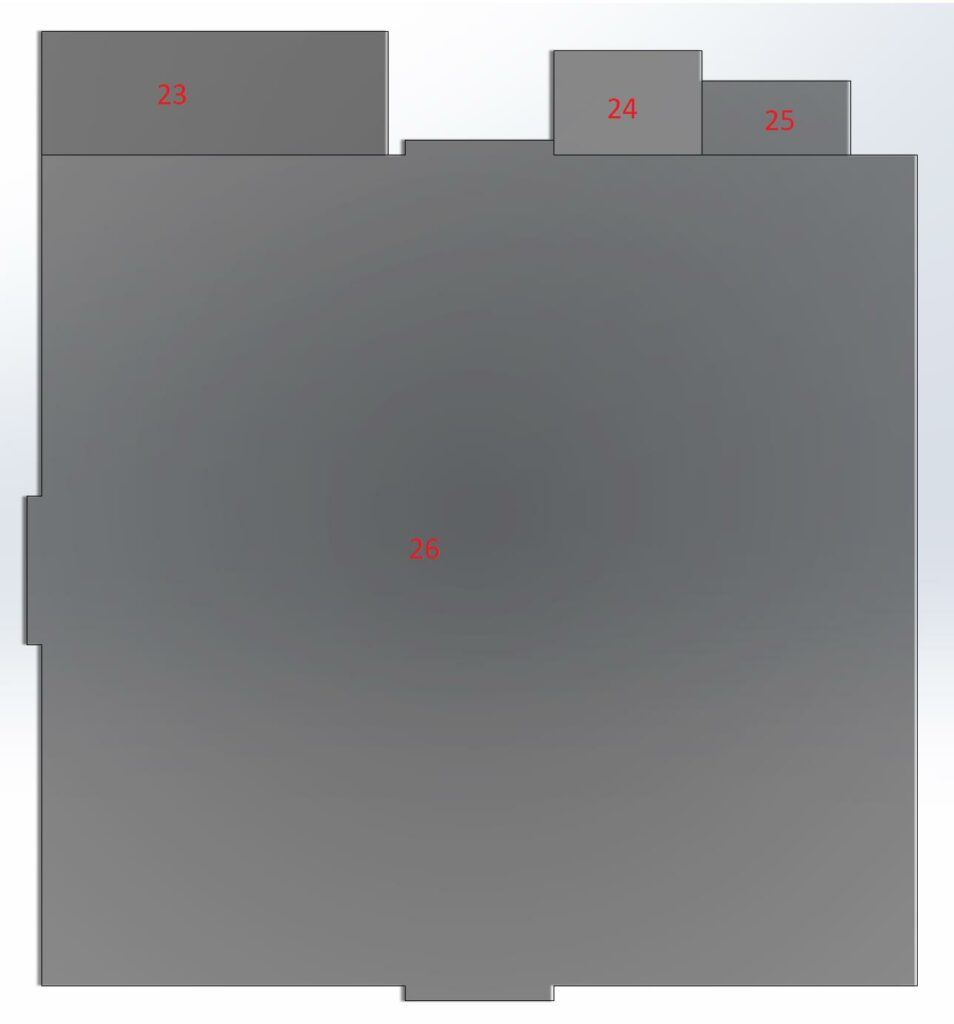
Assembly Instructions
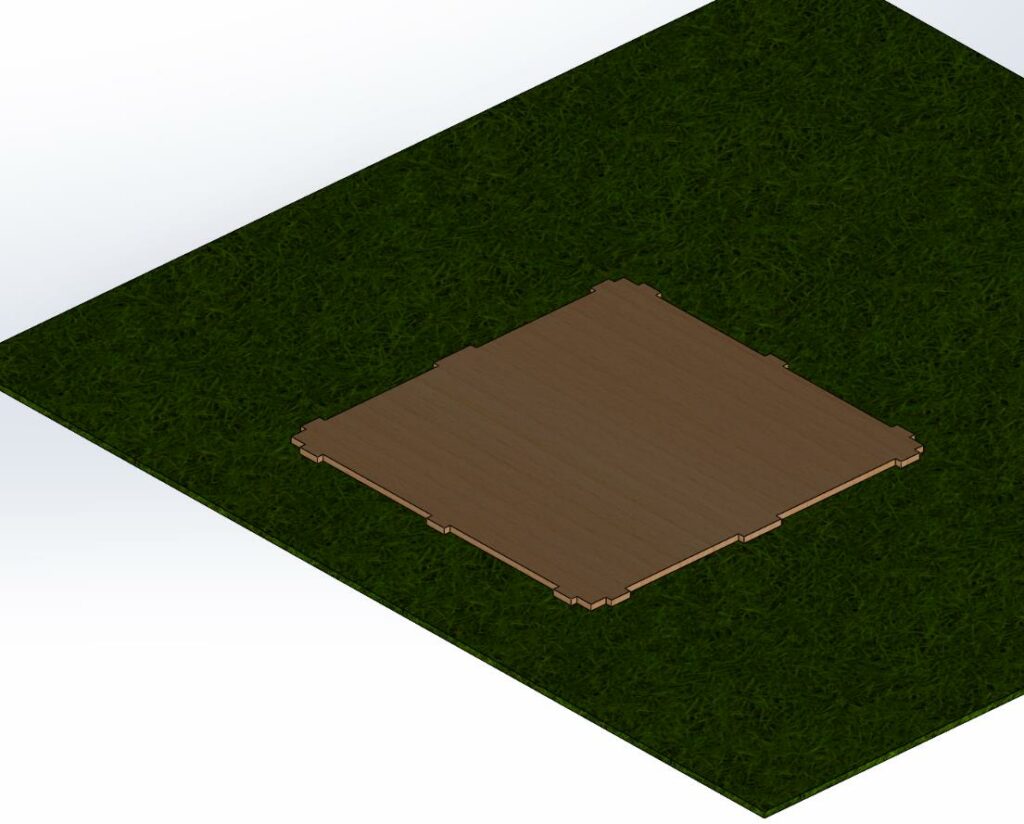
REMARK: We will assume that you have a container (a box or a tray) filled with soil where to place the house with proper dimensions. Using soil is recommended because it will allow you to hide some electronic components under the soil. If this is not an option, just simply put the house on top of a table with proper dimensions.
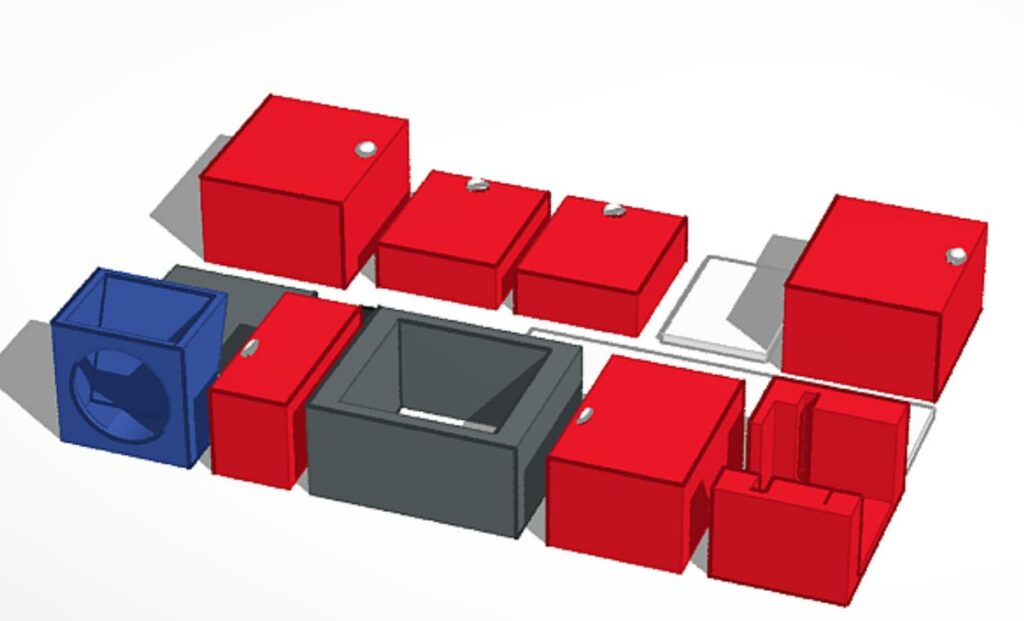
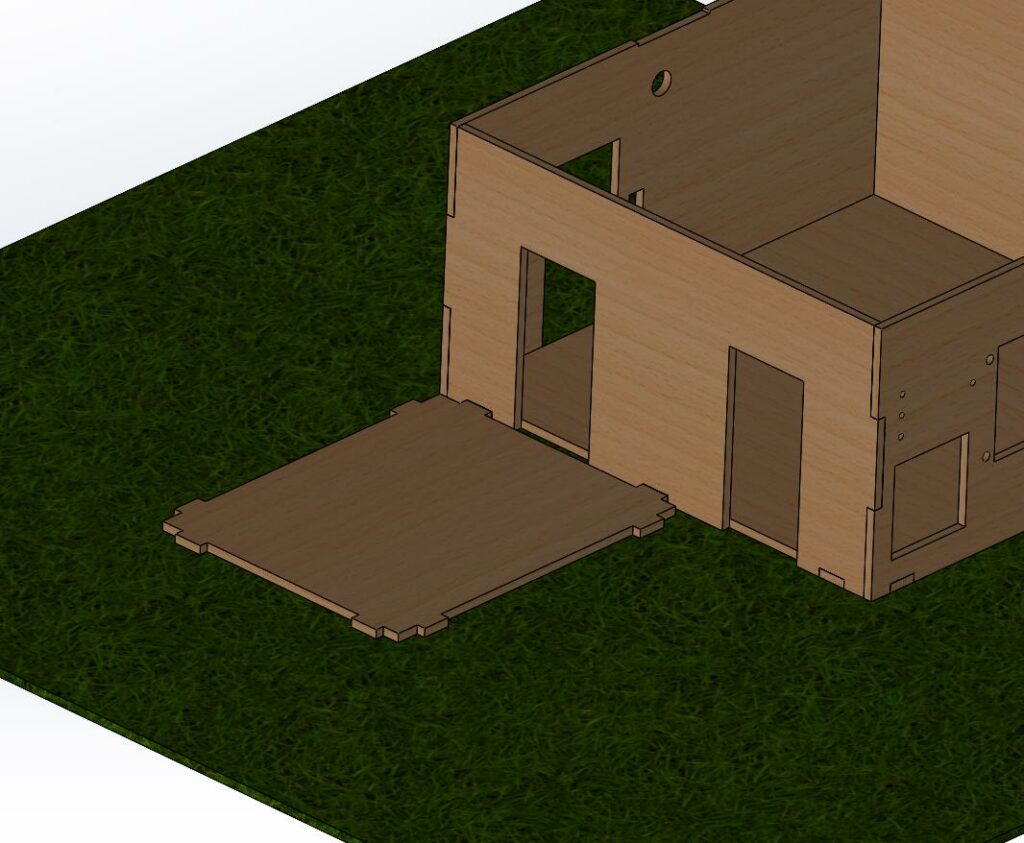
Step 1. Place the floor of the living room (#1) on the soil.
Step 2. Using parts #2, #3, #5 and #9 build the walls of the living room.
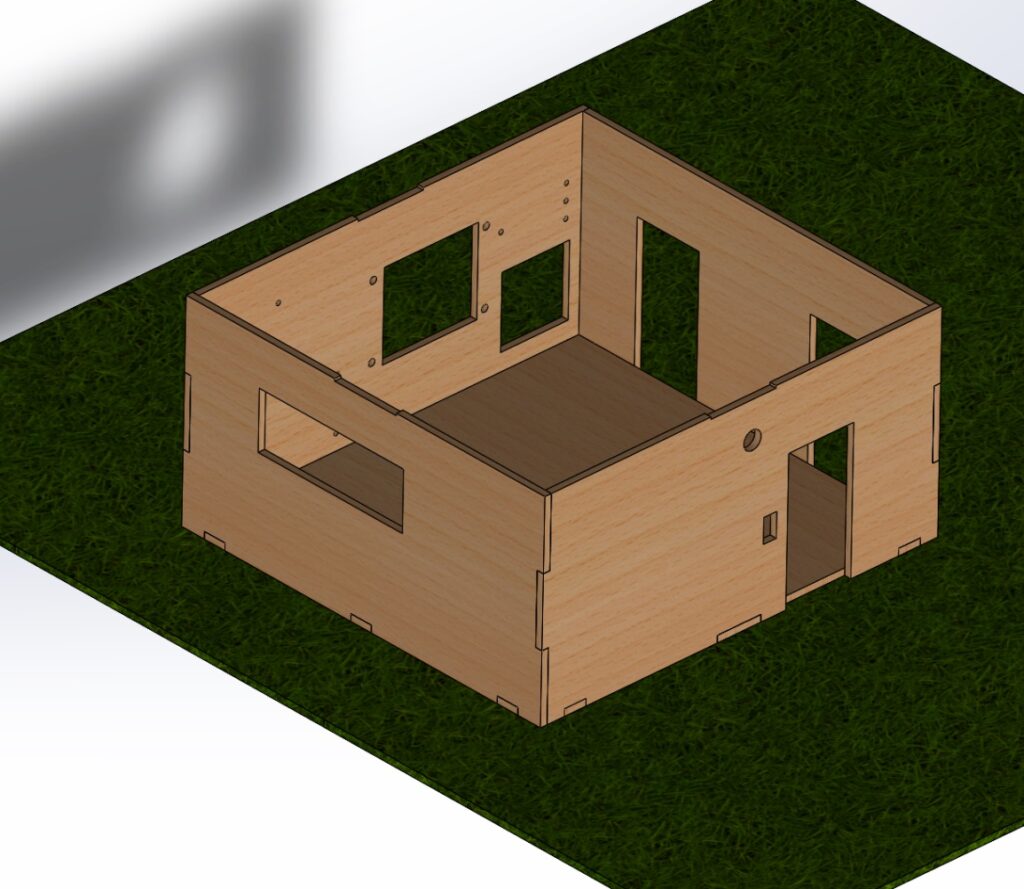
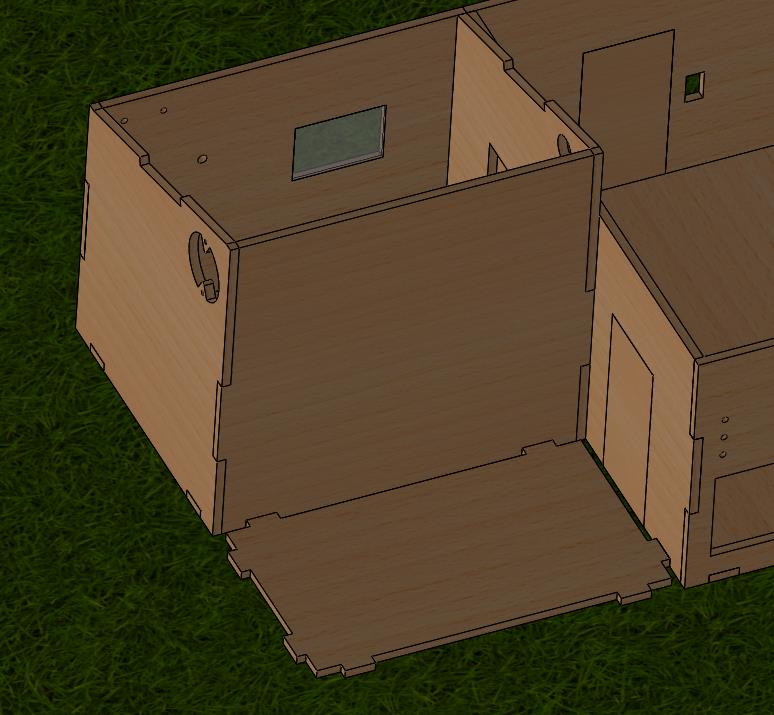
Step 3. Place the floor of the bedroom (#8) on the soil.
Step 4. Using parts #10, #12, #15 and #17 build the walls of the living room.

Step 5. Place the floor of the kitchen (#11) on the soil.
Step 6. Using parts #13, #14, #16, #22, build the walls of the kitchen.